

PLEASE CLICK ANY PHOTO IN THIS TUTORIAL TO ENLARGE
When I set out to make this piece it was purely experimental. I'd been working on a recent body painting image. The image above isn't anything special. In fact the pose was not a pose at all but a staging photo taken at the very begin of a shoot of 500+ photos. I'd pulled the image out because I had thought I might use his left hand in another piece I was working on and began some minor digital variations to the origin.

I'm always on the look out for new ideas for my work and I noticed that the combination of digital techniques I'd used transformed the man into something that reminded me of an old fashioned flat map. I was suddenly onto something new. So I refined it a bit more.

I'd brought out the line work in his body more and could see contour that more resembled a flat map. Now I lightened him up a bit.


There was something there. I could sense it. But I did not want a complete body shape involved. So I cut the piece down to center just on his torso.

There was definitely structure there. I could see plateaus, rivers and mountains on the mans chest. I decided to flip the image one rotation to the right.

Now I could see it without a doubt. But there needed to be some refinement to the shape. So I brought up a second image of the man, at a slightly different angle and repeated the process above on the second photo. I felt that if I had used parts of the first image to cover over elements I did not like, patterns would be repeated. By using a second image I could do some cut and paste to cover things over without any pattern repetition.


Once I had the second image I began taking portions of it and overlaying it over the first image to block out the hands, and the darkened areas between the torso and the arms.

You can see here that most of the body shape is not gone. But most of the original shape of the central torso are still present. My first step was to define the waterways which would be present on a map. I recolored key rivers and even a bit of ocean in the bottom right.

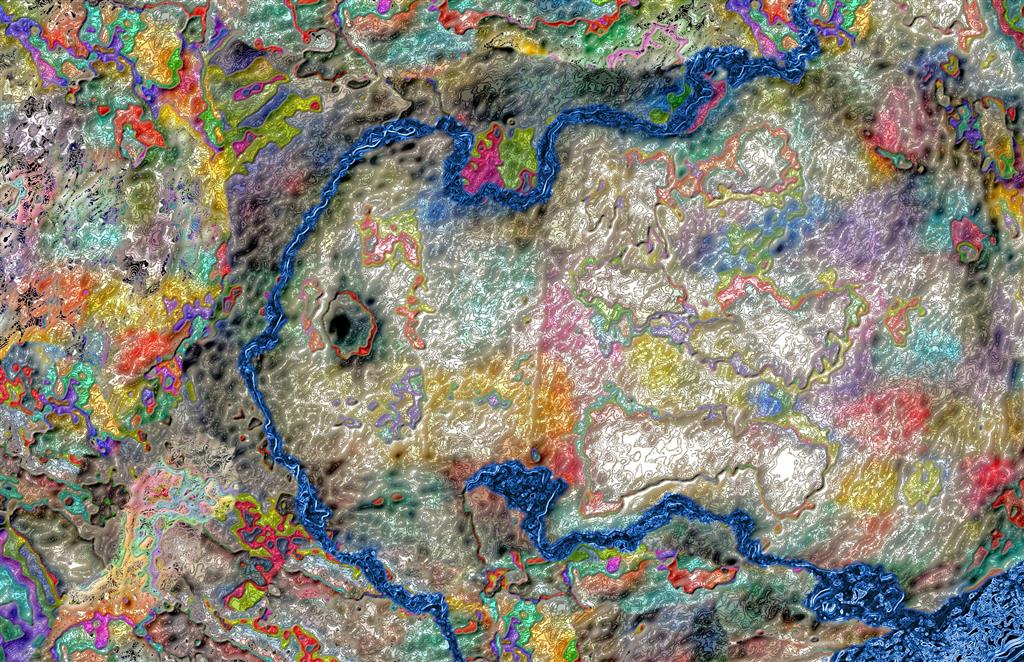
With the rivers defined it immediately took on the form of a map. I took what was originally the mans belly button and turned it into a lake.

Now I began to define mountains, choosing places where the contour lines were more pronounced.

Once I had the mountains laid in, I then lightened the remaining spaces so they were not as bright. This made it feel older and a bit faded to me.

Now it was time to lay in some dense forests. I changed the underlying pattern just enough to make it a bit more three dimensional.

From here I added some lakes and ponds.

Now I went back and lowered the hues down a bit more, again aging the whole composition.

At this stage I added an antique frame to the edges.

Now I felt the map itself was the way I wanted it. Now I added a circle to the right side to begin creating a compass rose. I kept the underlying map contours beneath it and just darkened the circle itself.

Directional letters were now added around the compass rose.

Now came the most complex part of the map. I wanted to create a schooner ship to overlap the center of the compass rose. To do so I used an original photo of a tall ship at dusk I'd taken several years before.

I then rendered the ship down to nothing but black and white line work and eliminated anything but the masts.

I then darkened the image to make the lines stand out and then resized the image down to a scale which would fit in the compass rose. The blue is due to the size. Your seeing it blown up here. Again very tricky to keep a resolution that worked.

It took me about 20 tries to get it the way I wanted it constantly adding it, refining it and adding it yet again until I achieved my objective.

Now it was time to add data. This is trickier than it might seem just glancing at this graphic. I had to try a variety of shapes and colors to make them stand out on the map enough to be seen. I tried a number of shapes and finally settled simply on a star to mark the locations of major cities. The largest star being designated the capitol of my fictitious land.

Now I added smaller black diamonds to designated small towns and villages.

Now I had to name them all. This was not just randomly thought up names. I want to use this for part of the Revenant project later, so I wanted the names to have meaning. I chose a font that was easier to read and condensed to take up less space.

The final stage was to create a face plate with the name of the country on it.

And with that last touch it was complete! I'd made a map out of a mans torso and belly button. The total process from start to finish was about 7 hours of work. I recorded the digital steps taken to get to the original map design so that I can duplicate it later.
I hope you found this tutorial of interest. If you have questions or comments, please put them in the disqus box below this post. I'll be happy to answer them.
No comments:
Post a Comment